Dwarsligger
-
Posts
438 -
Joined
-
Last visited
-
Days Won
20
6 Followers


About Dwarsligger

-

Update over het stoppen van SimTogether
Dwarsligger replied to etienne123's topic in Announcements & News
Dat kon niet. Etienne gaf geen antwoord als je overname wilde bespreken. Waarschijnlijk omdat hij al met SimTopia bezig was, maar dat geheim moest blijven. Yes, but don't pretend like this could not have been avoided. This is happening because the admin wants it to happen, and not for any other reason. Emotionele chantage. Nice... En het antwoord is "ja", dat zie je toch? -
Update over het stoppen van SimTogether
Dwarsligger replied to etienne123's topic in Announcements & News
Nouja, als je etienne een bericht stuurt waarin je interesse toont, krijg je geen antwoord, dus ik denk eerder dat er geen behoefte aan is. -
Check je PM
-
Als je de Thalys skins voor de TGV bedoelt, deze waren oorspronkelijk afkomstig van rail-sim.de Als je ze daar ook niet kan vinden, stuur maar even een PM.
-
Stoppen met TSC en stoppen met ondersteuning van vragen
Dwarsligger replied to Sjef61's topic in Announcements & News
Ook ik wil je graag bedanken voor alle hulp. Zonder jou had ik waarschijnlijk nooit van de grond gekomen qua lua. Ik wens je veel rust tijdens je "pensioen". -
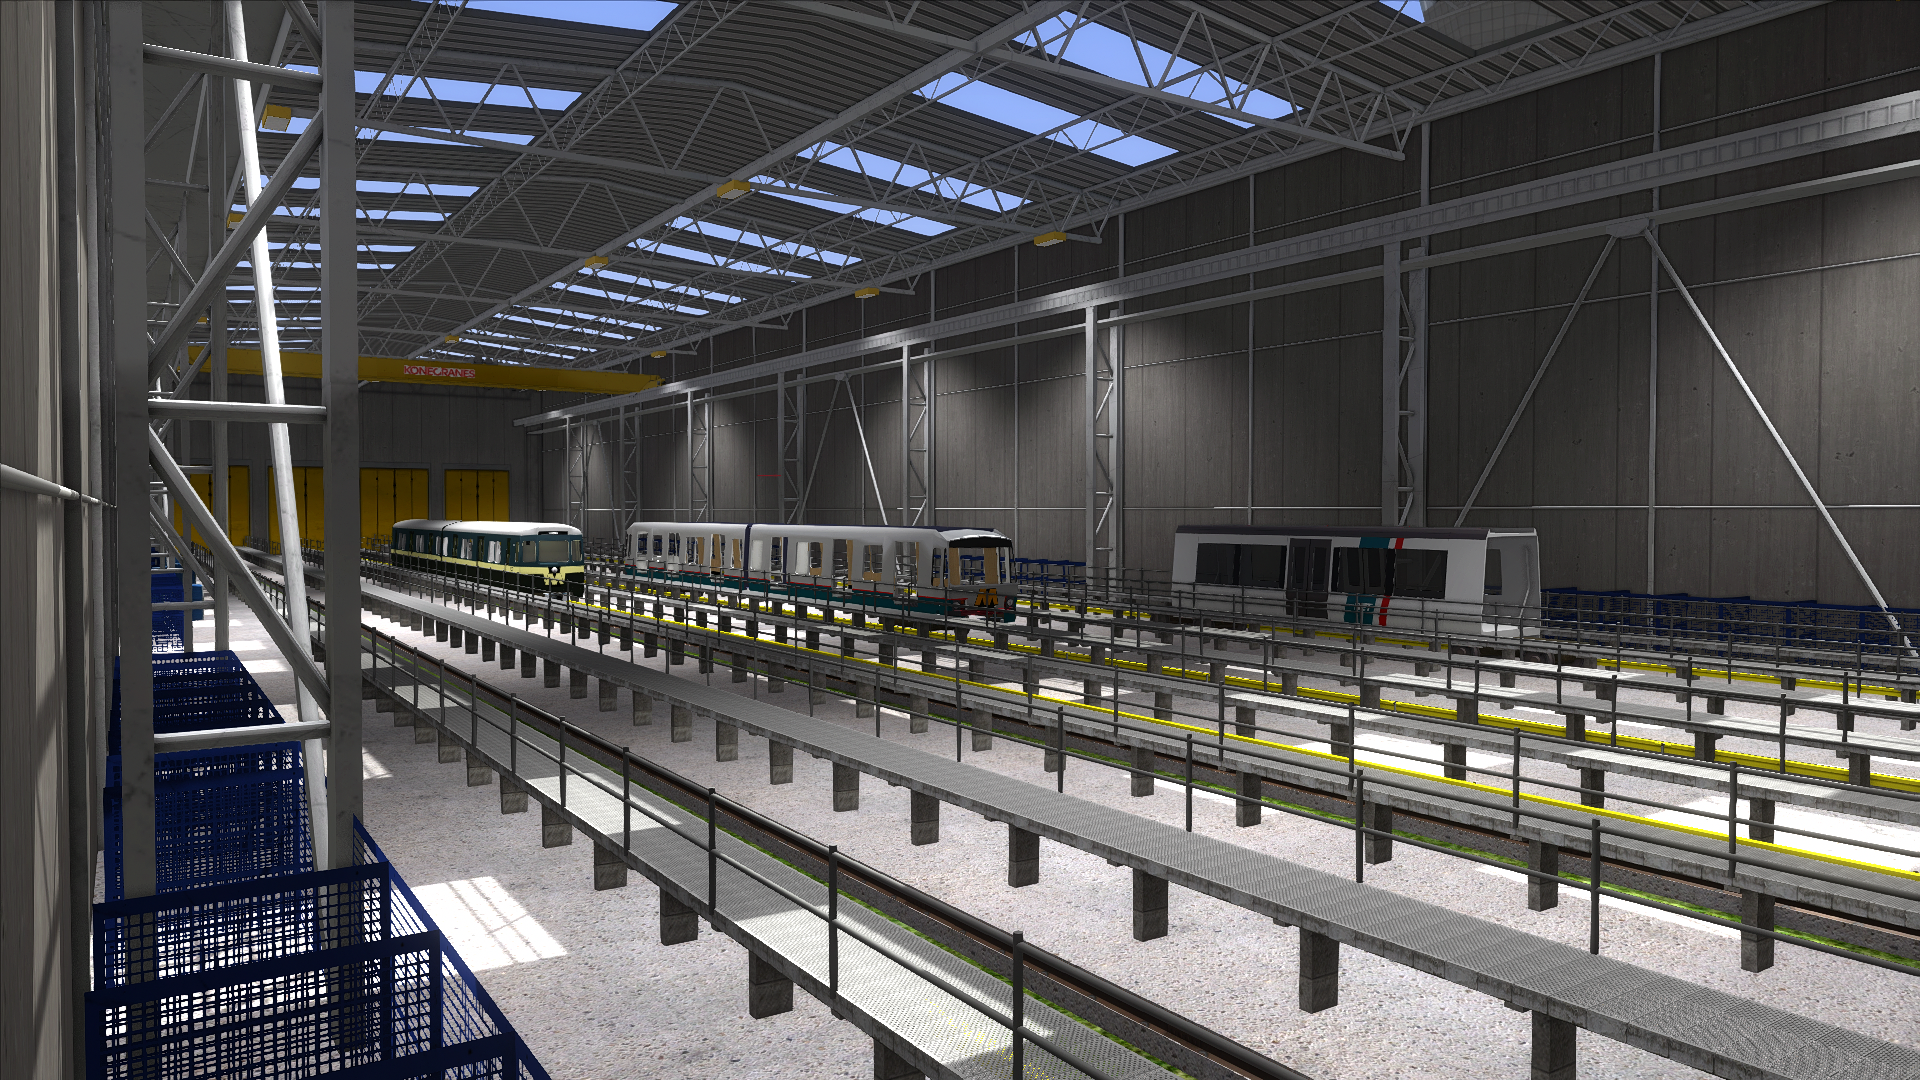
Kan je een screen laten zien? Ik heb die route destijds heel vaak gereden, maar heb geen flauw idee wat je bedoelt...
-
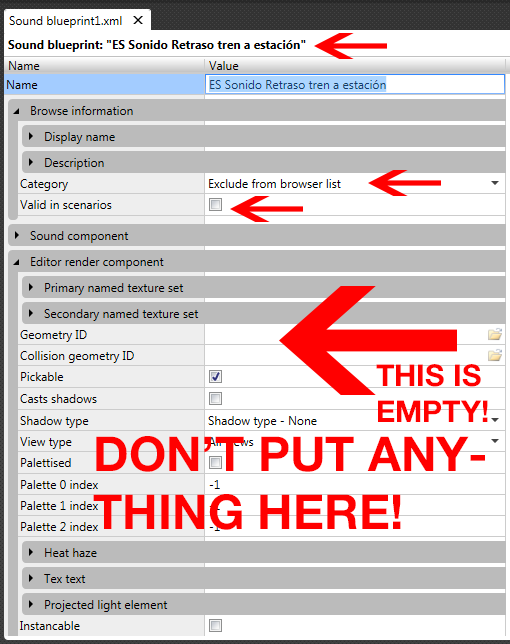
Now place it in the route editor. Save. When you play the game, the object is gone, isn't it? You can only see it in the Route Editor, right? And THAT's why you don't enter a scenery object into the sound blueprint!!! If when using my way, the object didn't appear, you are still trying to place the sound blueprint directly instead of the scenery blueprint. Also, your question about Instance Groups? The answer is in your own screenshot, if you just READ. There's a category called "Instance Groups", maybe you should click that open... But who am I kidding? I'm pretty sure you're not going to read this.
-
Sjef, he's asking how to alias to that marker that goes into the geometry field inside the sound blueprint when you make sounds without visual geometry. Meaning he's entering a .igs file into the sound blueprint...
-
If you don't want to give up then just keep reading until you understand. Nothing more I can do for you until you understand the concepts "child blueprint" and "don't add geometry to the sound blueprint if you want it to appear in-game."
-
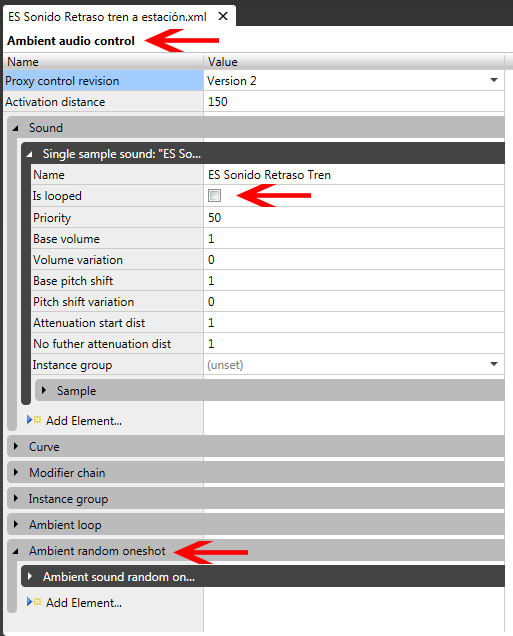
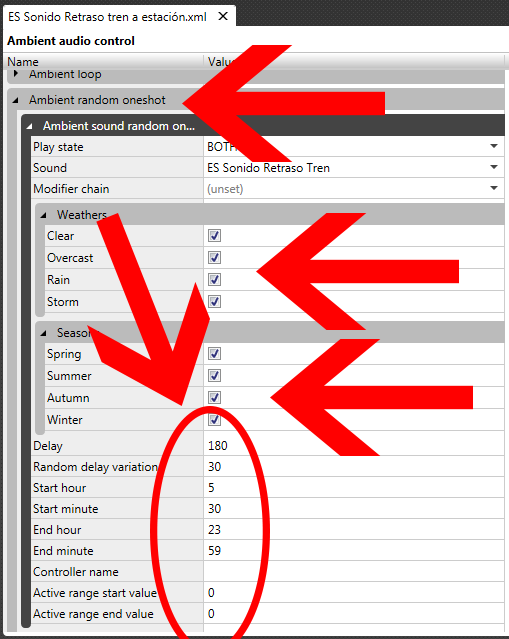
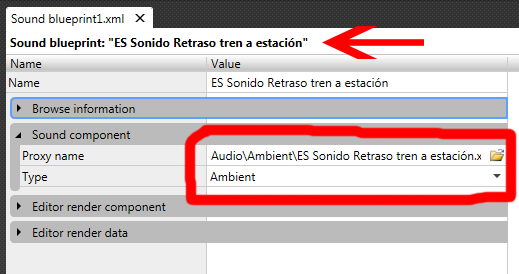
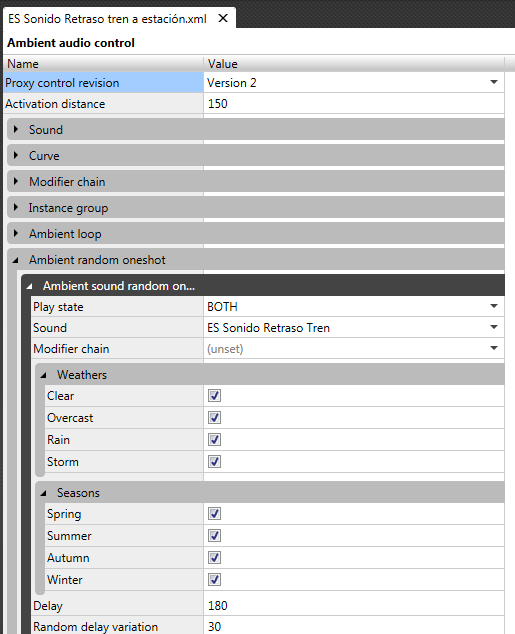
One last time. If you still have questions, don't ask them, but read again. If it doesn't work, you should give up and accept that sound is too difficult for you. Can't show it to you any simpler. STEP 1: SCENERY BLUEPRINT WITH CHILD OBJECT. STEP 2: SOUND BLUEPRINT WITHOUT (!!!!!!!!!!!) IGS FILE Did you put an .igs file in here? If so, remove it. STEP 3: SOUND BLUEPRINT a.k.a. AMBIENT AUDIO CONTROL STEP 4: ENTER CORRECT VALUES IN THE RANDOM ONE-SHOT (last arrow on previous image) I think the arrow might be a bit small, but I hope you see them. Do it exactly like this. If you understand it now, read my first explanation again until you understand it completely. If you still don't understand, give up. Like I said before, I don't want to be a jerk, but you don't understand even the simplest of things. It's very tiring for me to explain things like this. I have nothing personal against you, and I don't want to make you feel stupid, but just READ, for f*#k's sake. Good luck, and remember, if you have questions, don't ask them, but read again! Look at the pictures and try to see what the arrows are pointing to and why that's important. Good luck, and I truly wish you well.

-
XML calls IGS and another XML. That other XML calls the audio. Audio is last in the chain and NOT first. Please read. Carefully examine my files. I can't explain anymore right now. I've been awake for 2 days. I'm going down. Good evening and bye. Maybe I'll show it on video tomorrow.
-
Geometry is the shape that you see in the game. The .igs file What I mean, is what you do, is you add the .igs to the sound blueprint. That is wrong. You add the .igs to the .xml and inside the .xml the sound blueprint is referenced. Just compare with my files and see what is different. Check the screenshots of the 3 steps and pay close attention. I'm tired now. I have to sleep for a bit.
-
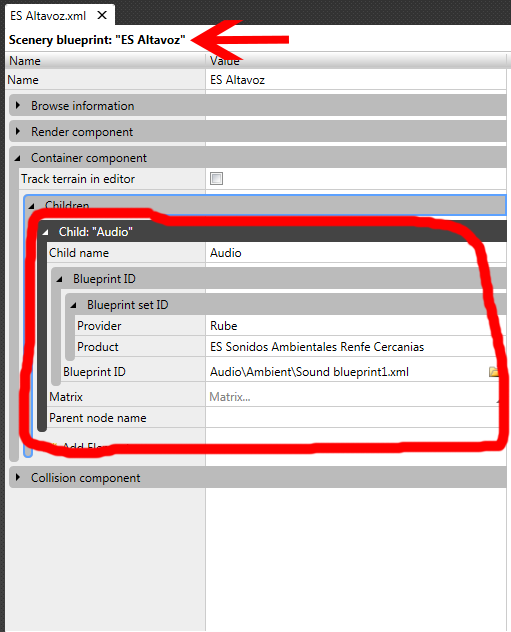
Keep reading and compare my files to yours. I think you're doing Step 1 wrong. I think you forget to add the child to the blueprint. In TSC, a blueprint (.xml file) can point to another blueprint. First you make the scenery object, then you point that to the sound blueprint. In STEP 1, take a good look at the Children part, encircled in red. Do you have that in your scenery blueprint, too? The object contains the sound, and not the other way around.
-
Dat turqoise overtrekken wat ik gedaan heb? Photoshop: path maken met de Pen Tool, control + klik, rechtermuisknop -> Stroke Path. Dikte lijn is afhankelijk van brush size. Uitleg Pen Tool Geef mij de texture anders maar, dan maak ik wel ff snel de normal map om je op weg te helpen. Ook hier: Pen Tool Geloof me, je spul gaat hier zo veel beter van worden. Ik gebruik het ook niet overal op, maar bij materieel en grote objecten is het veel mooier.
-
If you enter geometry there, it will only appear in the editor. That is for sounds without visible geometry. Have you actually studied my files? READ CLOSELY. WATCH THE RED ARROWS AND CIRCLES. PAY ATTENTION STEP 1: STEP 2: STEP 3: I don't try to be a jerk, but it's almost like you don't WANT to understand. .igs in sound blueprint is bad. Kaka. Big no-no. Don't do it. Sound blueprint inside scenery .xml file good. Do it. Epic win!