

rcdevisser
-
Posts
8,399 -
Joined
-
Last visited
-
Days Won
25
Content Type
Profiles
Microsoft Flight Simulator
SimTogether.com
Download News
Trainsim News
Store
Blogs
Gallery
Events
Downloads
Forums
Competitions
Tutorials
Everything posted by rcdevisser
-
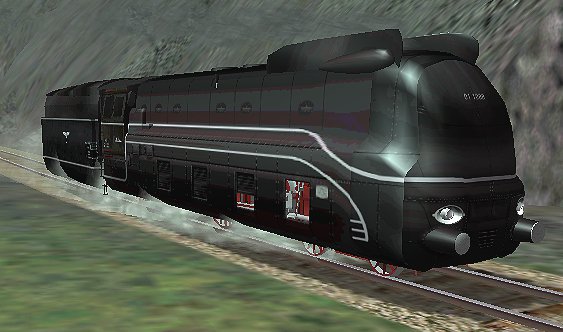
 MSTS: De 01 1088 langs de bergkam in de omgeving van Landeck
 -
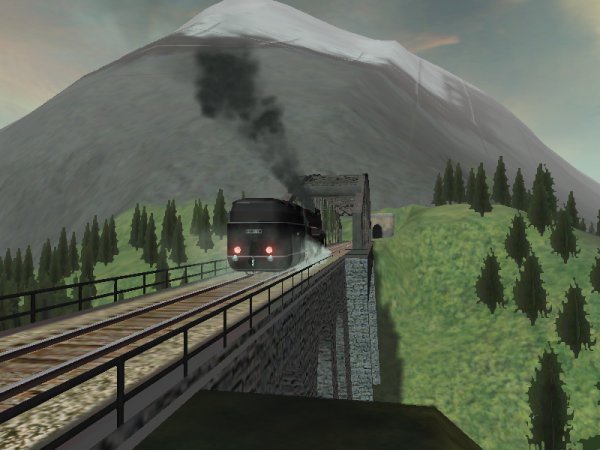 Uit het MSTS tijdperk: Br 01 1088 passert hier de Trisanna Brug op de lijn Innsbruck - St. Anton (Arlbergbahn)
 -
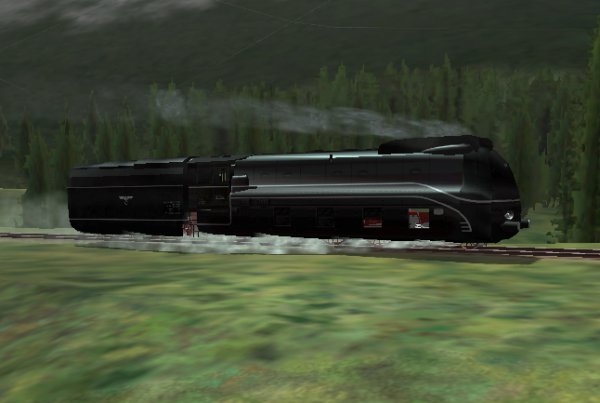
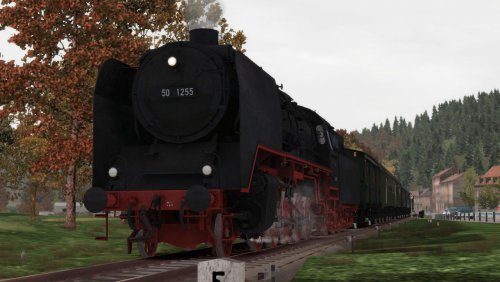
 Uit het MSTS Tijdperk; De gestroomlijnde 01 1088 van Mad Mike op de Arlbergbahn, 1 van de 6 stamlijnen die bij MSTS werd meegeleverd.
 -
-
-
-
-
-
-
-
Version 1.0.1
61 downloads
Keyboard assignment for Steam locomotives from Niclas Lindner. Useful for all steamers that are created by Niclas Lindner. Unzip the file and read de read me for full installation -
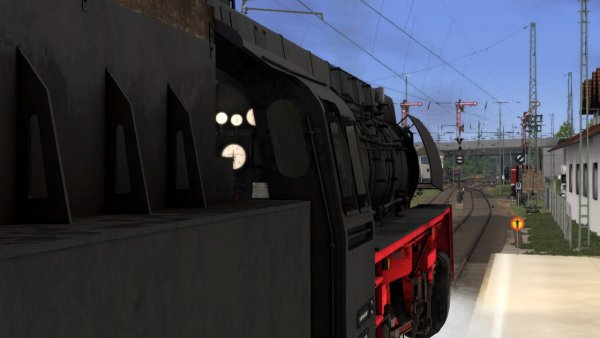
Now when you have walked through all the steps as mentioned in de blogs before this one, you should have your boiler on pressure right now. When you take a look at the boiler pressure gauge, the needle should near 16 Bar/Atm (-/+ 235 PSI) and this is the right pressure to pop off with your engine. Now take a look at the screenshot of the 4 gauges that are mounted together on a small rig and take a close look to these 4 gauges. Now first before you hook on your train you need to check the pressure of the brakes. and be sure you check the brakes! You open the air pump by opening up the spindle that is connected with the steam valve that operates the air pump. Now open up the air valve by turning the spindle clockwise and the air pump will start working. Check out your main brake air pressure gauge and the needle should rise untll about 5,5 Bar/Atm. Now set your handbrakes before you test the brake system. you apply the handbrakes by pressing the [ / ] (slash) Button. Now as the handbrakes are set you now are able to proof the brakes of the engine. We are still operating the class Br 52 of the DR and at your right hand you will notice two levers on top of or near and above each other just aside of the side windows. Now push the upper lever away from you so that upper lever appoints towards the front of the engine. You can also press and hold the [ } ] button to release the independent brake. As you now listen you will hear the engine brake that is releasing. The way the engine brakes is operating is different in comparison of the train brake. You are using air pressure to release the engine brake. Normally a train brake uses air pressure to get the train brake released, but you now increase the air pressure in the engine brake system to operate the brake properly. This brake system has several names like "Independent brake", "Local brake", "Engine brake" or "Loco(motive) brake". When you push forward the lever the air pressure will decrease and will now release the "Independent brake" The pressure in the brake system will drop and when the gauge shows 0 Atm/Bar (Zero). This gauge is smaller than the main brake gauge and is mounted left of the main brake gauge. Now you are able to pop off. The independent brake is completely released. When you now operate the lever in opposite direction (towards you) the air will operate/apply the independent brake and the engine should stop (if the engine was moving). Watch now the Gauge ais the pressure increased while you are applying the independent brake. Okay so far, so good. Now you have tested and proof the engine brakes/independent brake. Now you are ready to go the first meters. At the next step we will shunt and hook on our train.
-
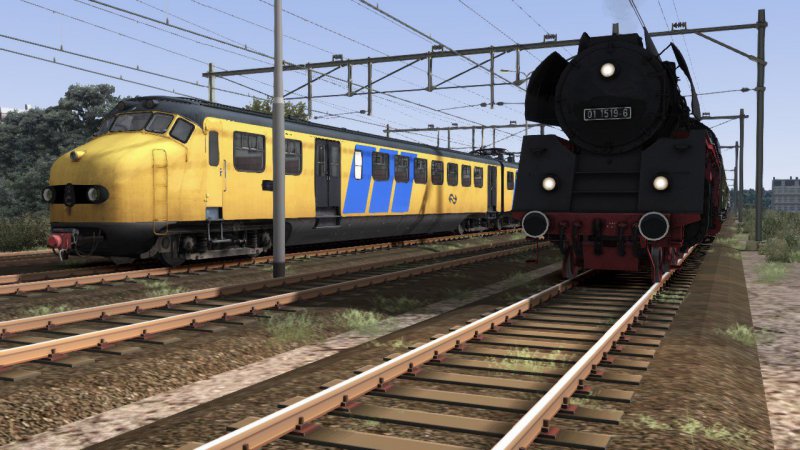 Mat 54 en Br 01 1519 De 01 staat klaar voor een Stoomrit door Nederland
 -
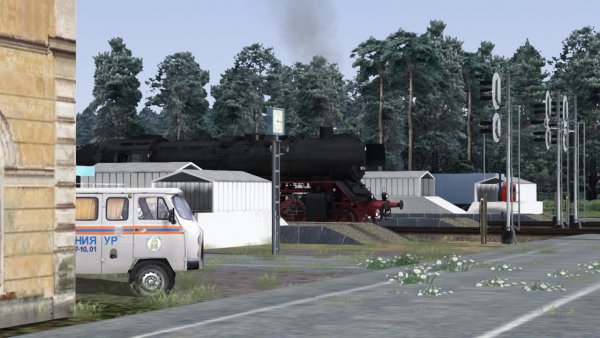
Now after you have prepared your engine in order to pop-off with your train it is time to get ready to depart. In order to do so you need to set up your engine for a brake test. First check out your boiler pressure and become familiar with checking the boiler pressure very time when you have shoveled coal onto the fire grate. Something about firing Firing requires a skilled fireman. firing is not just throwing some coal onto the fire grate but you need to fire the engine proper and very precise. When you take a look on a real engine you will notice the fire grate is sloped in an angle. This is not withour reason. the front part of the fire grate is lower than the back part of the fire grate. SO when you throw some coal on the fire bed , you need to throw coal just underneath the door. and the sides of the fire grate in the fire box. The middel of the fire grate must just be covered with a minimum of coal. When you shovel, just shovel the coal at the sides of the fire grate and underneath the fire door. The motion of the engine will spread out the coal on top of the fire grate itself. On a distance of 50 km / 35 mile you shovel 1000 kg of coal. The common frequency of shoveling is about every two minutes 6 or 7 shovels of coals spread out over the coal bed accordingly. Another way to manage the coal is to check out the color of the smoke out of the chimney. You start shoveling coal when the coals has turned grey/white. The moment you start to shovel will give a black smoke out of the chimney as well. Now in TS20xx it is not simulated properly, but by pressing [ F ] you open the fire door. By pressing [ R ] you start shoveling. TS20xx just notice the order to fire by pressing [ R ]. However uktrainsim has a program that contains a stand-alone for download and the program drives a steam locomotive. That program it is more specialized to it. It shows exactly where to shovel and throw coal in the fire box. Unfortunately it is not implemented into TS20xx and either MSTS. Listen when you shovel. and count the amount of shovels you throw on the fire grate. As long as you have counted the amount of shoveling until 6 or 7 shovels then you cease shovel by pressing [ Shift ] - [ R ] and close the fire box door by pressing [ Shift ] - [ F ] This is the way to keep up your fire in a proper way. The use of water pumps and injectors Injecting water is already explained to you and I will continue this subject later on. Now it is very important to do one thing at a time and it is very important to know not to shovel and inject water at the same time. It is also very important not to fire the engine when passing a tunnel in order to prevent a fire blow-back. Before you enter a tunnel just make sure you have ceased firing and open up the blower and dampers completely. This is the proper way to inject and shovel and to create pressure in the boiler. Now you are ready to pop-off the moment the gauge shows 15,5 atm.
-
rcdevisser Driving the Steam locomotive - Before you pop off (ENG)
rcdevisser posted a tutorial in Driving with Steam
Hopefully you have done all the things you need to do in order to start driving a steam locomotive. I personally have done some sound modification and sound installations in order to get a better sound. Most engines comes with default sounds an do appear as some steam like noises instead of real sounds sampled from real engines. However you need to get the engine prepared now prior to departure. As you have already done your duties and checking everything including the PC. Now it is time to set up the engine prior to your shift. Presuming you now got a good fire and the pressure gauge shows 15,5 bar. Now decrease the blower by pressing [Shift] - [ N ] but do not shut down the blower completely. Keep the damper open and open up the cylinder cocks to drain off water that is condensed in the cylinder steam. IMPORTANT; The need to open the cylinder cocks is very important. Steam will condense back to water and water can not be compressed and therefore to get rid of the water out of the cylinder blocks you need to open the cylinder cocks in order to drain the water out of the cylinders. If you do not open the cylinder cocks the water will blow off your cylinders lids with a hughe damage to the cylinder blocks. Now keep the brakes on and open the regulator slightly so the cilinders will be warmed up. Once you have done this check out the water level and if needed inject some water until the water level has reached at least 3/4 of the water glass. To do so you need to operate the injector. This device is actually created from 3 "funnels" fitted in a tube and one funnel is pointed in the opposite direction. Now FIRST open the water flow by pressing [ K ] and THEN the steam flow by pressing [ I ]. Notice the sequence here please!!!! First WATER and then STEAM !!!!!!!!! At advanced engines like the Just Trains steam locomotive Advanced range such as the British Standard class in the MT series, it is even more complicated and far more realistic then at the Br52 that comes by default with ELAP or Ruhr-Sieg line. In our case we are still operating the Br52. Now inject for about 2 - 3 minutes and the cease the injection of the water flow in reverse. This means close the steam flow prior to the water flow. In this case of the class Br52 press [ I ] and then [ Shift ] - [ K ] Now once you have drained oof the water and injected until the gauge shows 3/4 of the total water level. Now you need to test the brake system. Press [ J ] in order to fill the brake pipes of the whole train and apply the brakes of the engine itself in order to avoid a run-away train. This can be achieved by pressing the bracket button [ "}" ] Now when the brake pipes are filled up to about 5,5 atm apply the brakes by pressing [ "{" ] until the main brake pressure gauge shows 4,5 atm. You can also use your mouse hovering over the main brake lever which is situated just underneath the engine brake lever. Left click the mouse when you arew hovering over the main brake lever and pull the lever toward you until you have notice the train brake air gauge has reached 4,5 atm. Now cease the test braking test and push the lever towards to front of the engine. You can do this also by pressing [ "}" ] and scout the train brake gauge which will now increase to 5,5 atm. Once you have achieved all these sequences you are ready to pop off. -
Once you have listen to the sound that comes by default with the ELAP aiming the class Br 52 you better install the sound that is available at: www.rail-sim.de The soundpack you can download is far more originated instead of the default sounds that comes with the ELAP package. The ELAP package comes by default when you purchase the Ruhr-Sieg Line. Even the USLAP package comes with the Ruhr-Sieg line. Now we will maintain the ELAP and by default the 52 5992 is ready to roll accordingly to the scenario "Historic Freight Train". However this scenario got some issues which I am trying to resolve but you do not neen any extra asset in order to run this scenario. Most of the proper sound updates are at: "www.rail-sim.de" In the download section you need to go to; "https://rail-sim.de/forum/wsif/index.php/Category/85-Sounds/" store these files on a easy-to-acces location on your HD. NOw unzip all files and store theise unzipped files. Now you check out all the available sounds according your collection of steamers, download them, unzip them and install them. Don't forget to back-up the original sounds, then install the updated sounds using the TS Package Installer. Remember where you have stored these files. Otherwise open the Explorer by pressing [ Windows ] - [ E ], locate the file where you have stored the downloads for TS20xx. Now you select the sounds in the files at the proper location and install these RWP files using TS20XX default installing program
-
rcdevisser Driving the Steam locomotive - Preparation (ENG)
rcdevisser posted a tutorial in Driving with Steam
Hi to all and Welcome to this educational blog. In this first episode I am going to explain how to prepare your engine in default mode. We will start with the Class 52 of the East German Railway Deutsche Reichsbahn at the Ruhr Sieg line. Though the Class 52 was ceased service in the former West Germany the original design of class 50 remains untill the end of steam The East German Railroad stall had this class completely overhauled and most of them were fitted with a new boiler which gave more performance in comparisment with the non refurnished class 52. Class 52 was a war machine and a redesign of class 50 but with less equipment due to WWII activities. Class 52 comes with the Ruhr-Sieg line as an default engine and later the 3d Creator "Eisenbahnwerk" added a tanker-tender to it better known as: "Wannentender" which were often in use with severall steam locomotives in Germany. The "Wannentender" was widely used with class 38 (P8), 42, and 52 This simplified self-carrying tender was a half tanker with a coal unit fit to it causing less weight to the engine itself. Now when you start to prepare your engine prior to departure you need to check your engine. Not only your engine must be prepared but also your virtual environment like your PC , monitor, keyboard and mouse. Nothing is so annoying as a nonfunctional keyboard and mouse during the execution of a scenario. Here is a list you check prior to start anything in TS20XX; - Cables connected? - Power plugged in? - Monitor powered? - PC powered? - Keyboard and mouse working? - Monitor set? (Brightness, color, whitebalance, etc?) - Sound Speaker set? - Chair is in comfortable position? - You got anything to drink or eat? - Cell phone in sleeping mode of turned off? (Do not drive and use cell phone even during the execution of a scenario!!!!) Okay, so far so good! Now when you should drive a real steam powered engine you need to prepare your engine priorr to departure. Depending the size and scale of a steam locomotive it takes about 9 hours before a standard 1:1 engine is able to run after the fire has been ignited. Metal needs to be settled as the temperature rises. and the steam pressure in the boiler starts to increase. In TS20XX the engine is already pressurized but still you need to to perform somethings prior to departure. Here is the check list you need to do: Topping up supplies is only available with water and coal. These fuels are already topped up. In reality you need to check the whole engine and search for failure all along the engine itself. - Open the blower by pressing [ N ] - Open the dampers by pressing [ M ] - Open the fire door by pressing { R } - Start shoveling by pressing [ F ] Keep on shoveling for 2 minutes - Stop Shoveling by Pressing [ Shift ] - [ F ] - Close the fire door by pressing [ Shift ] - [ R ] - Check the boiler pressure. The is should be at 16 atm now. Now in standard mode you are able to continue shoveling without any problems. but in the reality you must stop shoveling in order to avoid embers and cinders. Embers and cinders will cut-off the oxigene flow through the fire grate and creates a slack. Before you start to drive open the air pump by pressing [ J ] or move the mouse over the air pump valve which is situated just above the regulator. By default the air pump is running, but using the [ J ] will open the steam flow towards the air pump. The air pressure of the brake system must be at least 5 atm/bar in order to operate te brake system. When everything look fine right now. then you are ready to run. Keep an eye on the pressure continuously during the run. Next episode I will continue with the next lesson -
Now if you want to practice your driving skills, I have set up a simple scenario which is downloadable at the download section at SimTogether. Once you entered the download section search and find: "Departure - Time to pop off". This scenario is available soon after publication of this Blog. In this scenario you will start at Hagen Freight Yard and you will haul a standard tfreight train towards Hohentlimburg siding. This run takes about 16 minutes and when you practice your driving skills please refer to this blog in order to drive the engine properly. You need only the Ruhr-Sieg line in order to run this scenario. Furthermore this option: A better update of the sounds of the engine. The improved sounds of the Br52 can be found here. If you do not wish to update it will not affect the scenario. So don't worry. When you have test your brakes according to my last blog you are now ready to hook on your train and get prepared for the real job. When anything look okay to you, you now get prepared to roll and hook on your train from the starting location. Most of the times you are at the depot near the station where you need to pick up your train to start your shift. Now check out the boiler pressure and open up the blower by pressing [ N ] until the blower is fully opened. Open up the dampers by pressing [ M ] this provides oxygen from underneath the the fire into the fire mass through the fire grate. This will increase the boiler pressure. Now set the reverser in the proper direction and lock at about 30% cut-off. Open the steam driven air pump. Release the train brake and independent brake and open up the regulator by hammering the latch/regulator away from you with your left arm [ A ]. Release the hand brake by pressing [ / ] if not set. The engine should start rolling right now. Adjust the steam flow by regulating the regulator pressing [ A ] or [ D ] depending the speed and boiler pressure. As you have reached 25 km/h (15 Mph) shot of the regulator, but not completely. Keep the regulator a fraction open so steam will still flow through the cylinder blocks but will not use the steam power. Let the engine roll towards the right train and check out your boiler pressure and water gauge. Once reaching your train shut of the regulator on approaching your train. Watch the pressure gauge regularly in order to prevent a pressure drop. Open the cylinder cocks. [ C ] Be sure the water is at least 2/3 of a glass You can check this out at the water glass. 1/3 should be empty. Adjust the independent brake to slow down at about 2 km/h. Shut off or adjust the regulator in order to keep rolling with very low speed. Adjust the brakes so you are rolling out against your train. Be sure your coupling speed is about 0,5 km/h other wise stop before your train and then move up slowly keeping the reverser cut-off at 30% and adjusting the regulator until you slowly pick up some speed. Roll out against your train and bump softly the buffers of the wagon rack. Now set the independent brake or hand brake. Now when you have stopped at your rack of wagons "jump out" of your engine [ 8 ] and navigate to the back of your tender/engine and hook on your train hovering over the coupler until the mouse changes into a coupler symbol and right-click on the coupler. The coupling action will now execute and now you need to get back to the footplate [ 1 ]. Get on the footplate and apply the train brake and watch the needle of the train brake gauge descent untill 4,7 bar is reached. Release the train brake and watch the needle increase towards 5,5 bar. Set the reverser at 70% Cut-Off. Once the 5,5 bar is reached set the train brake lever in the middle position. Now when you have test your brakes you are now ready to hook on your train and get prepared for the real job. When anything look okay to you, you now get prepared to roll and hook on your train from the starting location. Most of the times you are at the depot near the station where you need to pick up your train to start your shift. Look out the window and if there is no one at the platform close to the train you now pop off to your destination. Open te regulator by hammering the regulator manually until you start to roll. When rolling for about 25 meter close the cylinder cocks [ C ]. Set the reverser back to about 60% and adjust the regulator. As you now pick up speed set the reverser further back to about 50% cut off. Now watch the boiler pressure. Once you have almost reached the speed limit make sure you find your balance by adjusting regulator, reverser, speed and boiler pressure. This is one of the most harshest moments because you need to find the right balance so you don't loose speed, neither boiler pressure. Now adjust the reverser and regulator so the boiler pressure is increasing but do not loose any speed. Make sure the blower is still on [ N ] ( to reduce the blower; press [ Shift ] - [ N ] to adjust ) Open the fire door [ F ] Start shoveling [ R ] and shovel coal on the fire grate. Shovel about 6-10 scopes of coal on the fire grate. The fire mass must increase in the fire chaimber. To stop shoveling, press [ Shift ] - [ R ] Do not shovel more than 10 scopes of coal in one time. Close the fire door [ Shift ] - [ F ]. Check the boiler pressure. Now when you have done this you are almost ready with the first sequence, but now you need to inject water into the boiler. The engine normally has two injectors or one injector and one feeder pump. MOst German engines has a steam driven feeder oump and a automated semi-self-working injector. Smaller engines often has a simple injector. Your engine Br 52 has 2 simple injectors. and to operate these injectors will go in a strict sequence. Both injectors works the same way. An injector contains two funnels in a tube pointed to each other. An other funnel is also included and pointed in the same direction and is placed just behind an other funnel. This funnel provides steam to the water. Once steam is blown into the water at high speed the steam will expand in the water due to the temperature difference. This reaction gives the water the pressure its pressure and due to that pressure the water will get injected into the boiler passing some safety valves and the water level in the boiler will increase. BE AWARE: HOT water is NOT working so when the water is hot the injection principe will not work or will cease injecting. The greater the difference in temperature the more force the injector will obtain. When the steam force is too much water will overflow and leak out of the drain tube which is fitted at the injector. In this case you need to adjust the water and steam flow in orde to get the injector back to work. At the Br 52 this is not simulated. An engine that simulates the proper working of the injector is for example the: Just Trains Advanced engines like the British Standard classes. Now you are driving. It is now important to maintain speed and shovel or inject water during driving. Every 2-3 minutes you shovel and every 2-3 minutes you inject water. DO NOT shovel and inject simultaniously!!! The possibility of a blow back of fire is at hand. Be sure the coal level at the fire grate should be at least 75% and the water level should be at least 70% not exceeding 85%. The Br 52 will run the best maintaining these values. Normally you shovel about 1000 kg at 50 km and will use approximately 1000 liter of water at normal speed. On shunting purposes you even use twice as much water in a half hour. You can read the engine values by pressing [ F5 ] two times. White text will appear in the upper left corner with all necessary information. Once you get the hang of driving you do not need added information like [ F5 ]. Now the situation is this when you have followed al these instructions: You did not need the HUD !!!!!! This way of driving is as realistic as possible.
-
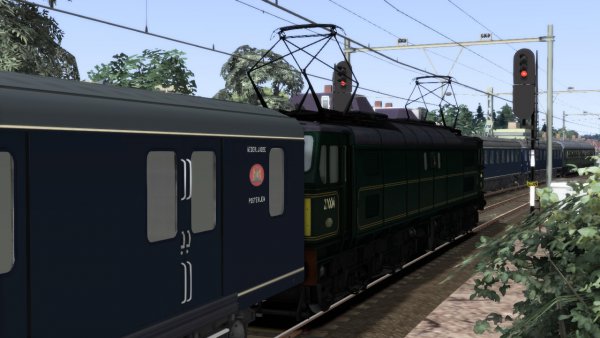 De 1500 voor een stoptonend sein en loopt straks over vanwege werkzaamheden
 -
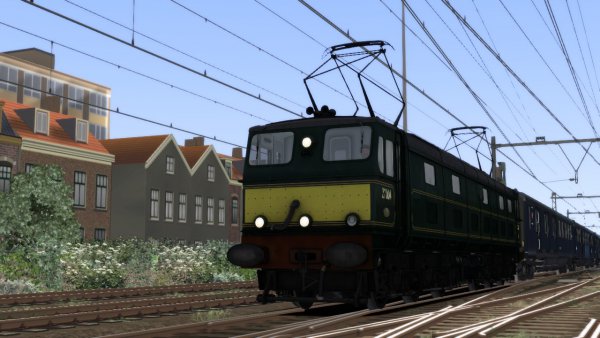 De 1500 teruggebouwd in originele uitvoering maakt muiseumrit over de RCR
 -
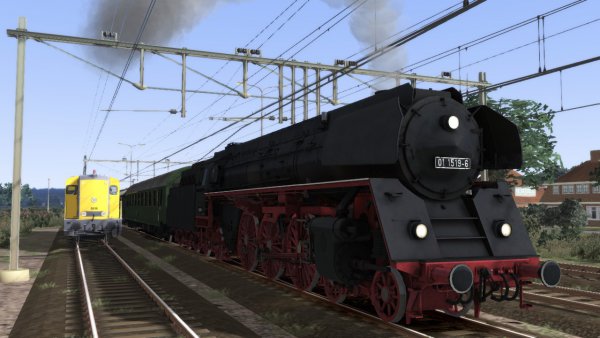
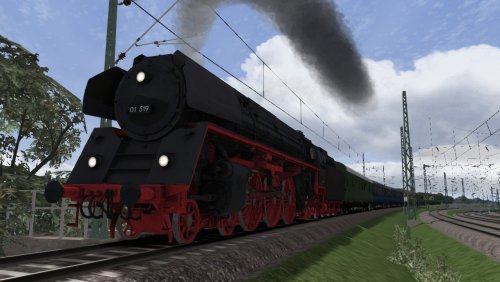
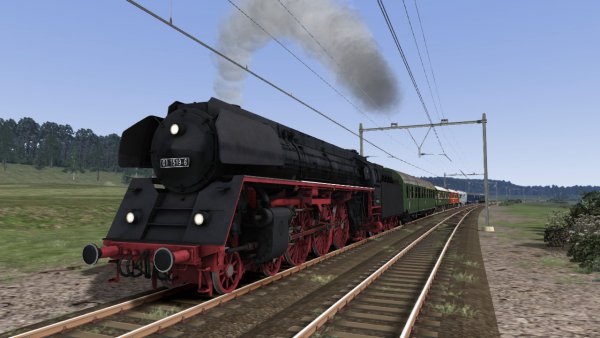 In volle glorie rijdt de 01 1519 over Neerlands sporen met een speciale bestaande uit ouder DR materieel en verstrerkt met Plan K rijtuigen (Bolkoppen)
 -
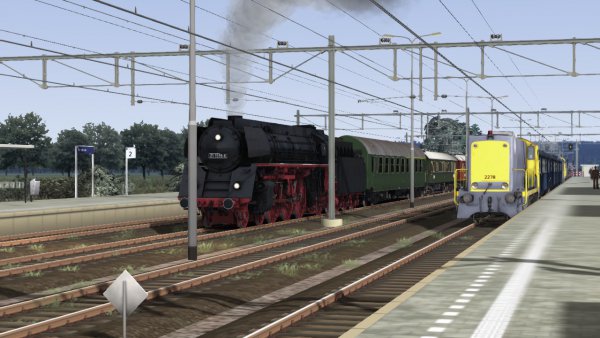 Onderweg naar Westeinde, rechts staat een trek-Du combinatie te wachten Twee 2200 met 3 Plan E's en een energiewagen.
 -
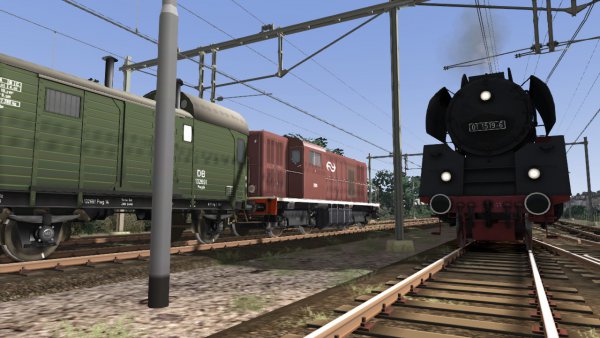 Een 2400 staat te wachten op het zijspoor tot de 1 1519 voorbij is
 -
Version 1.0.0
121 downloads
Small modification of the operation of the East German Class 01.5 from Just Trains. Read the included text file for more information which is in English and Dutch. And off you go...... R.C. de Visser - Steamtrains Unlimited -
 Karlshagen Siedlung DDR 1970